Skip to content
Skip to main content

More Civil War Letters

Wednesday, January 21, 2009

Here is another Civil War letter similar to the one posted below, only here the additional challenges were that the letter required some flattening of the wrinkles and folds before mending and the repair tissue had to be tinted.

This letter was pressed overnight between moistened blotter paper to flatten it.

Then the Walters repair tissue was tinted to match the original.  The tissue was brushed with a thin wash of acrylic paint and allowed to dry overnight on polyester sheet.

Once the tissue dries, mending proceeds as before.

To see a scan of the completed work in our digital collection, click here:

http://digital.lib.uiowa.edu/u?/cwd,5138

African American Museum of Iowa Grand Re-Opening

Friday, January 16, 2009

Today was the grand re-opening of the African American Museum of Iowa. A feat to be commended and celebrated. Since the June flooding, they have mucked out their building and restored it sufficiently to have staff back in the building, the beginnings of a museum store, and an exhibit installed. While doing all of the this, they also continued all their statewide programming and facilitated flood recovery work of the damaged collections. There’s much to be done but they have a great start.

Here are some photos of the grand re-opening along side the same area the day we entered the building to inspect for flood damage. The re-opening photos were provided by the AAMI.

Preparing Civil War Letter for Scanning

Thursday, January 15, 2009

One of the collections that the department is currently digitizing is a collection of letters and diaries relating to the Civil War.  While most are in good condition, a few are so torn that they require considerable mending before they can be scanned. 

For our mending, we use Walters repair tissue which we have previously prepared.  It is made by brushing adhesive (half paste, half methylcellulose) in a thin layer onto kozo repair tissue which is then layed down on a sheet of polyester and allowed to dry. 

 For mending tears, small strips of the Walters tissue are torn from the sheet using a needle tear or a water brush tear.  The strips are positioned over the tear with the dried adhesive side down and reactivated using a moist cotton swab or water brush.  They then dry under blotter or Remay and small weights.  Infills are treated similarly, with patches adhered to the edges of both sides of the paper loss.


To see the finished product, scanned and uploaded into our digital collection click here:

http://digital.lib.uiowa.edu/u?/cwd,5134

Good Preservation Practices Save Photos

Monday, January 12, 2009

These photographs were found among the documents from the African American Museum that were returned from the freeze dryer. This is one example of many envelopes full of photographs. These photographs were interleaved with sheets of archival paper which were adhered to the photographs when they were immersed by the flood. At a glance it looked like there was little hope of removing the paper from the pictures without damaging them. 

We took a couple of examples to the University of Iowa Photo Department where we were advised to try and wet the photos again to remove the paper. When we returned to the Conservation lab I put one of the photos in a bath of water with photoflo and left it there for about ten minutes. When I came back the paper had floated off and the photo had sunk to the bottom of the tray. As you can see, some of the emulsion adhered to the interleaving but the pictures are mostly intact.

I then let the photos drain vertically for a few minutes to get most of the water off so there wouldn’t be droplets and puddles on them when they were set out to dry. I set them out on our drying rack and let them dry overnight. In the morning I found them to be warped and curling which was to be expected after the aqueous treatment. I put the photos in between sheets of silicon release paper and put them in the dry mount press under medium heat. I left them for about 15 minutes and they came out almost perfectly flat. I then left them under weight for 24 hours and they are now perfectly flat.

If there had been no interleaving, these photographs would have been cemented together, never to be separated and none of this would have been possible. Thanks to the good preservation practices of this museum this photo collection will be salvaged.

Cleaning LP Covers

Friday, January 9, 2009

We have started on the covers, finally. After Caitlin and Nancy worked out the prototype, and found and ordered the proper plastic sleeves for the job, we just have to start digging in and doing the work. It makes the most sense to work on a box at a time, to get a bit of a assembly-line thing going. I first separate the dirty cardboard supports from the sheets with the printed images; sometimes these slip off easily, others require considerable coaxing. Once the entire box is free if its smelly cardboards, I begin dry cleaning each cover with a dusting of gound eraser crumbs, lightly massaging the surface to pick up the dirt. A good bit of it flakes off, but so far there has still been staining after dry cleaning. We did the 45s first, and Gary recommended we swipe the still dirty areas lightly with cotton dampened with vulpex and water. This seems to remove some staining, but I do test the inks for colorfastness. I have done two boxes so far this way, and Caitlin has taken over flattening them, since she really wanted an excuse to use the fancy sealer. After they are all clean and flat, I can slide them into the sleeve with the new .20 three flap supports. And then we coo at them, because they are finished and pretty.

Leigh Ann Inspects Proposed Conservation Work

Wednesday, January 7, 2009

Our close proximity to the museums we are working with gives us the advantage of easy communication with their curators. Leigh Ann Randak of the Johnson County Historical Society was able to come down to see how our Head Conservator, Gary Frost, was coming along with the ledgers and county registers he had been working on. Being able to see what is being done gave her a better idea of how long things would take and how complicated the process would be. When figuring out how much money you have relative to saving a collection it makes all the difference to know exactly what is being done and to have the option to say, “this book wiill take 6 hours to fix and it’s not worth the money when we could replace it and save three others in that time for that amount of money”. Leigh Ann has been able to come down multiple times to go through the books and manuscripts to decide what we should work on and what can be replaced or let go.

The ledger shown in this photograph was already taken apart and was in loose sheets when we got it. Gary used the “double fan” method to bind the pages together using a very thin layer of adhesive on the spine before re-casing it into a new buckram cover. 

Moving The Music Library

Monday, January 5, 2009

Since we don’t know how long the music library will be inaccessible or even if the building will remain, the music collection needed to be moved. The Music Library began it’s move to the Main Library today and will probably take two weeks. The preparation for this move actually started in November. In order to make room for the music collection, the Chemistry collection on 2nd floor Main had to be re-located to the Hardin Library for Health Sciences. The circulating music book collection is going into the spot vacated by the Chemistry collection.

The rest of the collection (rare books, recordings, etc) will be taking over the 5th floor study lounge, so it can be locked and monitored. The music library staff will be on the 5th floor with that collection. We will be losing some additional seating in the Main Library an already tight situation.

The bid to move the chemistry collection and the Music Library was awarded to Carney-McNicholas, an Ohio based company. This is the company that moved the Des Moines Central Library and has worked on a number of colleges and universities moves.

Up Close and Personal

Friday, January 2, 2009

I like to wear these magnifying glasses to demonstrate how fashion forward we are at the University of Iowa Conservation Lab. Aside from being extremely attractive they are actually quite helpful in situations like this one. The infamous gourd drum which took roughly 40 hours to complete has hair attached around the edge of the stretched leather on the top which was caked in mud. After all the drum had been through, the hair was barely holding on so it wasn’t going to stand up to any normal saliva swabbing. I had to take a very small brush and a bit of water to try to brush the mud out of the hairs without releasing any of them. The magnifying glasses helped me to see what I was doing so I didn’t damage anything. Once I had brushed out most of the mud I went around the edges with a swab and saliva to get to the gourd and leather underneath and in between hairs.

Cleaning Gourd Drum

Wednesday, December 17, 2008 

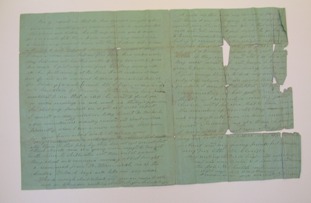
This gourd drum, an artifact from the African American Museum is a dried and hollowed gourd, the top has been sliced away to create an opening which has leather stretched across it. Two sticks intersect inside the gourd with the ends protruding from the sides, through the leather as you can see in the picture below. It is also wrapped with cord and there is a wooden handle attached through a hole carved in the bottom.

The cleaning of this particular item is complicated by the fact that there is still hair attached to the stretched leather
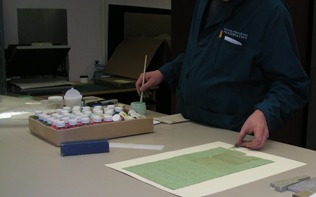
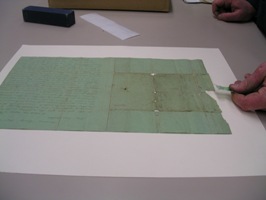
of the drum. It is mostly around the edges and was plastered down by the mud and silt that covered the entire artifact. I have been using a variety of techniques to remove the mud from the body of the gourd including a Poly Vinyl Alcohol sponge for the cursory cleaning and then cotton swabs and saliva for spot cleaning.  The hair that remains attached to the leather is proving very tricky to clean. On the stretched leather I have been using cotton swabs and saliva but the hair is barely attached and must be cleaned with extreme care, for this I have been using a very fine brush with small amounts of water. The hair detaches so easily that anything more abrasive will remove it.


The mud is so thick that this method is very time consuming, I have to go over the same areas repeatedly. I cannot however work on the same area for too long because when the area becomes too saturated the leather softens and the hairs release more easily. I’ve been rotating and working on different areas for shorter periods of time.

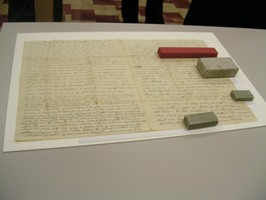
There will be some residual staining but the drum will be stabilized to the point that it will be safe to handle, and suitable for exhibit display. As of today I have spent roughly 30 hours on the gourd drum and I estimate that it will require at least 10 more hours if not longer.

Salvaging 45 Record Covers: From the Ridiculous to the Sublime

November 18, 2008

Unlike most of the LP covers, the 45 covers are typically printed directly onto the cardboard instead of printed separately and then adhered. This can be helpful or it can be a huge problem as in the case on the right. When this cover got wet, the image was transferred to the plastic sleeve it was in, when we cut it out of the sleeve in our initial cleaning and drying period the image came with it. We were forced to keep the plastic with the cover to save the image. The only thing that could be done was to scan the cover and use a print as a replacement, which is what you see below on the right. 

The cover on the left was in very good condition, many of the 45s were double or triple bagged in plastic and so were untouched by the water. We haven’t been through them all yet but the process is very similar to that of the LP covers. First we dry clean, then we spot clean with the vulpex/water solution. We flatten and mend if necessary and then collate with the corresponding record in a new polyethylene sleeve.